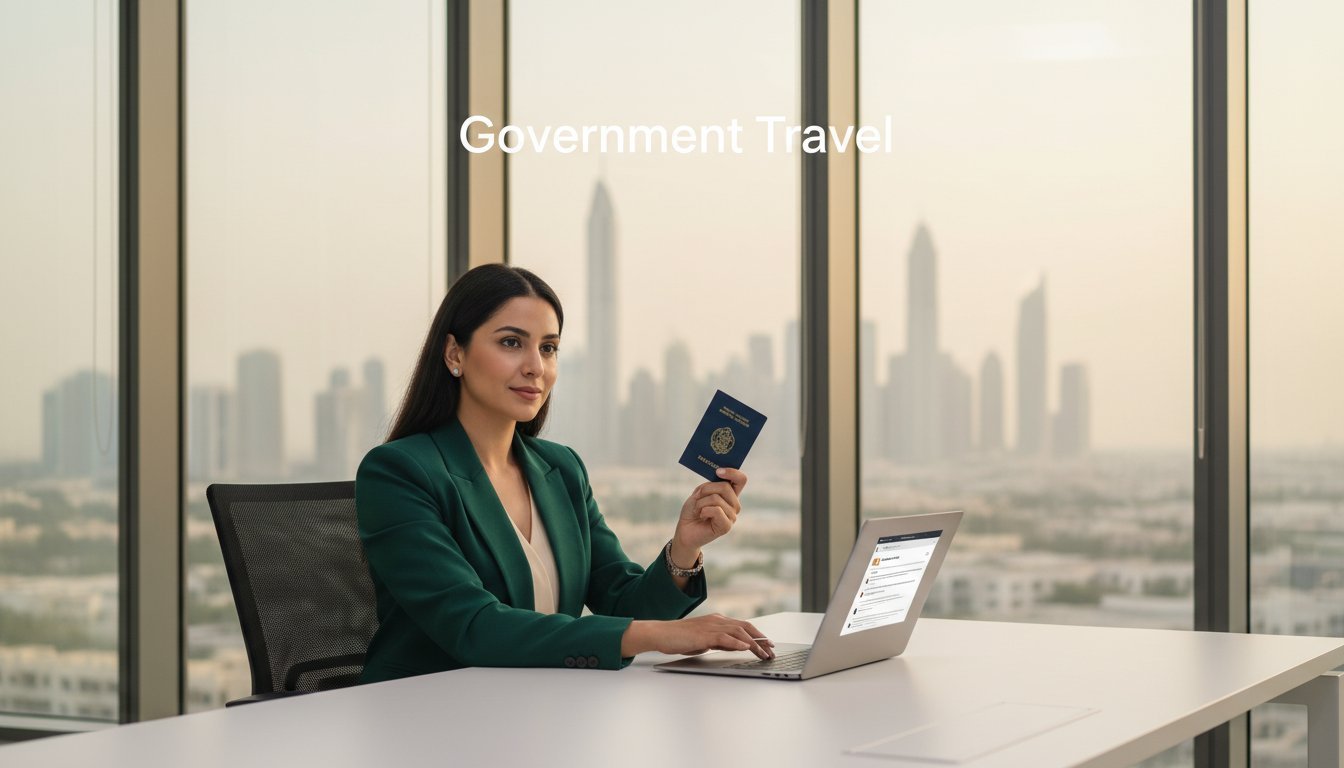
Imagine you’re sitting in a coffee shop in Dubai, scrolling through the Mirsal 2 portal, and suddenly the registration form feels like a maze. You’re not alone – many entrepreneurs hitting the free‑zone market hit that same wall of uncertainty when they first encounter the mirsal 2 registration steps for dubai free zone companies.
Here’s the good news: the process isn’t as cryptic as it seems once you break it down into bite‑size actions. First, you’ll need to gather your core documents – passport copies, a No‑Objection Certificate from your sponsor (if you have one), and a clear description of your intended business activity. Think of these as the passport stamps you need before you can board the flight to your new venture.
Next, log into the Mirsal 2 system and create a new “Company Registration” request. You’ll be prompted to fill out the company name, select the free‑zone authority, and indicate the share capital. In our experience, choosing a modest share capital (often AED 10,000) speeds up approval because the free‑zone authorities can verify the amount quickly.
After the initial entry, the system will generate a provisional licence number. At this point, you’ll upload the supporting documents we mentioned earlier. A handy tip: label each file clearly (e.g., “Passport_JohnDoe.pdf”) to avoid any back‑and‑forth with the authority.
Once the documents are uploaded, you’ll pay the registration fee – typically ranging from AED 2,000 to AED 5,000 depending on the free‑zone. The payment gateway is integrated directly into Mirsal 2, so you’ll receive an instant receipt that you can keep for your records.
Finally, the authority will review your submission. Most approvals come within 5‑7 business days. When you get the green light, you’ll receive an official licence copy via email, and you can proceed to open a corporate bank account, apply for visas, and start operating.
Real‑world example: a tech startup we helped in Dubai Internet City completed the entire Mirsal 2 registration in just nine days, thanks to a clean document checklist and prompt fee payment. Another client, a trading firm in Jebel Ali, faced a minor hiccup when their activity description was too vague; a quick tweak saved them an extra week.
If you’re feeling a bit overwhelmed, remember that you don’t have to navigate this alone. Our practical step‑by‑step guide to set up a free zone company in Dubai walks you through each screen of Mirsal 2, complete with screenshots and checklist templates.
So, take a deep breath, follow these steps, and you’ll be one step closer to turning that Dubai free‑zone dream into a real, operational business.
TL;DR
In just a few minutes you’ll see how the mirsal 2 registration steps for dubai free zone companies turn a confusing portal into a clear, actionable checklist.
Follow our quick rundown, avoid common pitfalls, and get your licence in under a week—so you can focus on launching your business, not paperwork.
Step 1: Gather Required Documents for Mirsal 2 Registration
First thing’s first – you can’t even start the Mirsal 2 wizard without the right paperwork in hand. It feels a bit like packing for a trip: you stare at a list, wonder why you need a spare pair of socks, then realize you’ll be sorry if you forget them.
So, what exactly should be on that list? Here’s the core set that every entrepreneur chasing a Dubai free‑zone licence will need.
1. Personal identification
Passport copy (clear, colour, with the bio‑data page visible). If you have a residency visa, tack that on too – the system will ask for it later.
Tip: name the file Passport_YourName.pdf and keep the size under 2 MB. Mirsal 2 rejects anything bigger.
2. No‑Objection Certificate (NOC) from your sponsor
If you’re a UAE national or have a local sponsor, you’ll need an NOC stating they have no objection to you setting up a free‑zone entity. It’s a one‑page letter on their official letterhead, signed and stamped.
Don’t over‑think the wording – a simple “We have no objection…” works fine.
3. Business activity description
Write a concise, yet detailed, description of what your company will do. Avoid vague phrases like “trading” – specify “import‑export of consumer electronics” or “software development services”. The free‑zone authority will reject anything that looks generic.
Imagine you’re explaining your idea to a friend over coffee; that tone usually hits the sweet spot for clarity.
4. Share capital proof
Most Dubai free zones accept a minimum share capital of AED 10,000. You can upload a bank statement or a capital deposit receipt. If you’re opting for a higher amount, attach the same kind of proof.
Pro tip: label it ShareCapital_AED10k.pdf and include a short note at the top of the PDF – it saves the reviewer a click.
5. Office lease or virtual‑office agreement
Free zones require a physical address, even if you’re using a flexi‑desk. Upload the lease agreement or the virtual‑office contract. Make sure the document shows the company name (or “to be assigned”) and the exact address.
If you’re still hunting for space, many providers let you get a temporary agreement that you can replace later.
6. Board resolution (if applicable)
For shareholder‑run entities, a signed resolution authorising the formation of the company and appointing the signatory for Mirsal 2 is mandatory. Keep it short – a paragraph with the resolution, signatures, and date.
Even if you’re a sole proprietor, this document can act as a safety net if the authority asks for extra proof.
7. Additional supporting docs
Depending on the free zone, you might need a copy of your Emirates ID, a recent utility bill for proof of address, or a certificate of incorporation from your home country if you’re an offshore entity.
Check the specific free‑zone checklist – it’s usually a PDF you can download from their portal.
Once you’ve gathered all these files, give each a clear, consistent naming convention. When you upload them to Mirsal 2, the system will automatically map the documents to the right fields, and you’ll avoid the dreaded “missing document” back‑and‑forth.
Need a deeper dive into the whole free‑zone setup? Our How to Set Up a Free Zone Company in Dubai: A Practical Step‑by‑Step Guide walks you through every screen, complete with screenshots and a printable checklist.
And remember, a tidy document folder is half the battle won – the Mirsal 2 portal will thank you with faster approvals.
Step 2: Submit Application and Review the Comparison of Free Zone Portals
Now that your PDFs are neatly labeled and sitting in the master folder, it’s time to hit that big “Submit” button on the Mirsal 2 portal. Take a deep breath, click, and let the system do its thing. The moment you press submit, the authority’s reviewers get a copy of everything you just assembled.
What happens next can feel a bit like waiting for a text back after a first date – you’re hopeful, a little nervous, and you keep checking your phone. In most cases the review window is 5‑7 business days, but the exact speed often depends on which free‑zone portal you’re dealing with.
Why comparing portals matters
Each free‑zone authority runs its own back‑office workflow. Some are lightning‑fast, others take a bit longer because they double‑check activity codes or require extra compliance checks. Knowing the differences helps you set realistic expectations and, if you’re on a tight timeline, choose the zone that aligns with your launch date.
For a quick snapshot, check out our How to Set Up a Free Zone Company in UAE: A Step‑by‑Step Guide. It breaks down the major portals and highlights where you might shave a day or two off the approval process.
Quick portal comparison
| Free‑Zone Portal | Key Feature | Typical Review Time |
|---|---|---|
| Dubai Internet City (DIC) | Tech‑focused, streamlined digital submission | 4‑5 business days |
| Jebel Ali Free Zone (JAFZA) | Robust trade documentation checks | 6‑8 business days |
| Dubai Media City (DMC) | Creative‑industry validation | 5‑7 business days |
Notice the slight variance? If you’re launching a tech startup and need that licence yesterday, DIC’s faster turnaround might be worth the extra AED 1,000 fee. On the other hand, if you’re importing goods, JAFZA’s extra scrutiny could actually save you headaches later.
What to do while you wait
Don’t just stare at the “Pending” status and wonder if you did something wrong. Use the waiting period to line up the next steps: open a corporate bank account, start drafting your shareholder agreement, or even schedule a quick chat with a legal specialist.
Many entrepreneurs find it useful to prepare a “post‑approval checklist.” It might include items like:
- Requesting the official licence PDF.
- Setting up a corporate email domain.
- Ordering business cards (yes, the old‑school stuff still matters).
Having this list ready means you can hit the ground running the moment that green light appears.
Common hiccups and how to dodge them
Sometimes the portal will flag a missing clause in your activity description. It’s usually a tiny wording tweak – think “software development and licensing” instead of just “software.” Fix it, re‑upload, and you’ll be back on track.
Another frequent snag is the file‑size limit. If you get an error, compress the PDF (but keep it legible) or split a bulky document into two parts. The portal accepts multiple uploads for the same category.
Lastly, keep an eye on the email notifications. The authority will ping you if they need clarification. Respond within 24 hours and you’ll avoid unnecessary delays.
Remember, the submission isn’t the end of the journey – it’s the gateway to the next phase of turning your Dubai free‑zone dream into reality.
Step 3: Pay Fees and Obtain Preliminary Approval
Alright, you’ve uploaded every PDF, labelled everything like a pro, and hit “Submit.” The portal now shows a blinking “Pending” badge – that’s the moment you wonder if you’ve just paid for a ticket to nowhere. Spoiler: you haven’t. This is the stage where you pay the licence fees and wait for that all‑important preliminary approval.
First things first: pull up the fee breakdown that the free‑zone authority displayed on the payment screen. Most zones charge a base registration fee (usually between AED 2,000 and AED 5,000) plus a share‑capital deposit that shows up as a separate line item. For a typical tech startup in Dubai Internet City, the total comes to about AED 3,500. In JAFZA, the same package can be closer to AED 4,200 because of the extra trade‑document checks.
Step‑by‑step payment checklist
1. Confirm the amount. Double‑check that the fee matches the zone’s published schedule – a quick glance at the authority’s fee table saves you a nasty surprise later.
2. Choose your payment method. Most portals accept credit cards, but you can also use a bank transfer if you prefer a paper trail. If you go the bank route, keep the SWIFT confirmation handy; you’ll need to upload it as proof of payment.
3. Enter the transaction reference. The system will ask for a reference number. Paste the exact string from your receipt – the portal validates it automatically.
4. Save the receipt. Download the PDF receipt the moment it appears. Store it in a folder called “Fees & Receipts” inside your master MIRSAL2 folder. Trust us, you’ll thank yourself when the bank asks for proof.
Real‑world example
Take Maya, a solo founder from Berlin who set up a digital‑marketing agency in Dubai Media City. She paid AED 2,800 via credit card, saved the receipt, and uploaded the SWIFT copy just in case. Within 48 hours the authority sent a “pre‑approval” email confirming her fee was received and her licence was “under review.” Contrast that with Omar, who tried to pay the same fee with a corporate card that required 3‑day verification; his preliminary approval slipped by a full week.
What does “pre‑approval” actually mean? It’s a green light that the authority has verified your payment and your documents are internally consistent. You’ll receive an email titled “Pre‑liminary Approval – Licence No. XXXXXX.” That email usually contains a PDF of the provisional licence and a short checklist of next steps (bank account, visa, etc.).
Tips to speed up the approval
Pay early in the week. Authorities tend to process payments faster Monday‑Wednesday. If you pay on a Thursday, you might hit the weekend backlog.
Use a local UAE card. Some free‑zones flag foreign‑issued cards for extra verification, which adds 24‑48 hours.
Keep an eye on the inbox. The portal will send an automated “payment received” notification. If you don’t get it within an hour, log back in and check the “Payments” tab – a missed click can mean the payment never registered.
And remember, the fee you pay now is just the beginning of the financial commitment. You’ll also need to budget for the share‑capital deposit (often AED 10,000) and any optional services like a flexi‑desk or virtual office. Our Minimum Share Capital for UAE Free Zone Company: Complete Guide breaks down exactly how much you should set aside.
When things go sideways
If the authority flags a discrepancy – say the fee amount doesn’t match the zone’s schedule – they’ll email you with a request for clarification. Respond within 24 hours and attach the original receipt; most issues are cleared in a single exchange.
Another hiccup is a “payment mismatch” error, which usually means the reference number you entered was mistyped. Just re‑enter it, hit “Submit,” and you’ll get a fresh confirmation.
Finally, if you’re a crypto‑focused startup, you might wonder whether additional licensing is needed. That’s where specialist legal advice comes in. For tailored guidance on crypto compliance, check out NeosLegal UAE Crypto Lawyers – they’ve helped dozens of free‑zone firms align their licences with the latest blockchain regulations.
Bottom line: pay the fee, snag the receipt, watch for that pre‑approval email, and you’re officially past the gate. From here you can move on to opening a corporate bank account, applying for visas, and turning that provisional licence into a fully operational business.
Step 4: Receive Final License and Register with Mirsal 2
You’ve waited for the provisional licence, you’ve paid the fees, and that little green check‑mark finally showed up in Mirsal 2. At this point the real excitement begins – the final licence lands in your inbox, and you can start ticking off the rest of your launch checklist.
What the final licence actually looks like
The official licence is a PDF that mirrors the design you see on every Dubai free‑zone website: your company name in bold, the licence number, the activity code, and the validity period (usually one year). It also lists the share‑capital amount you declared earlier. Keep a digital copy in a secure cloud folder and print a hard copy for your office wall – it adds credibility when you meet potential partners.
Pro tip: open the PDF on a device that lets you add comments. Jot down the expiry date and the next renewal deadline right there. Trust me, you’ll thank yourself when the calendar reminder pops up six months before it’s due.
Registering the licence in Mirsal 2
Once you have the PDF, log back into Mirsal 2 and look for the “Upload Final Licence” button under the “My Licences” tab. The system will ask you to:
- Enter the licence number exactly as it appears (no spaces, all caps).
- Select the licence type from a dropdown – typically “Commercial” or “Service” depending on your activity.
- Upload the PDF file (max 5 MB, same naming convention as before – e.g.,
Licence_YourCompany.pdf).
After you click “Submit,” the portal runs an automatic validation check. If everything matches the provisional record, the licence status switches to “Active” within a few minutes. If there’s a mismatch – say you typed the licence number wrong – you’ll see a red alert and can correct it instantly.
Real‑world examples
Take Samir, a solo founder of a renewable‑energy startup in Dubai Silicon Oasis. He received his final licence on a Tuesday, uploaded it that same afternoon, and the portal confirmed activation by 5 pm. Because his licence was live, his bank accepted the document the next day and opened a corporate account in under 48 hours.
Contrast that with Lina, who runs a boutique design studio in Dubai Media City. She waited three days to upload her licence because she renamed the file “final.pdf” and the system rejected it for not following the naming rule. The extra lag pushed her visa processing back a week.
Next steps after activation
Now that the licence is active, you can move on to the three most common post‑licence actions:
- Open a corporate bank account. Most UAE banks will ask for the active licence PDF, your passport, and a No‑Objection Certificate if you have a local sponsor.
- Apply for employee visas. The licence number is a required field on the visa application form. Having it already active speeds up the immigration clearance.
- Register for tax and customs. If your annual turnover is expected to exceed AED 375,000, you’ll need to enroll in VAT. The licence is your proof of business activity for the tax authority.
Each of those steps has its own mini‑checklist, but the good news is they all start with the same document you just uploaded.
Expert tip: double‑check the activity code
Sometimes the free‑zone authority updates activity codes without notifying applicants. A mismatch between your business description and the code on the licence can cause delays when you later apply for a visa or a trade licence amendment. To avoid this, cross‑reference the code on your licence with the latest list on the free‑zone’s website. If you spot a discrepancy, drop the authority a quick email – they’ll usually re‑issue the licence within 24 hours.
Common pitfalls and how to sidestep them
1. Uploading the wrong file format. Mirsal 2 only accepts PDF. If you try to upload a Word doc, the system will reject it with a generic “Unsupported format” error. Convert first.
2. Missing signatures on the licence. Some zones require a physical stamp on the printed licence for certain transactions. Keep a scanned copy of the stamped version handy.
3. Ignoring the “Expiry Reminder” feature. Mirsal 2 can send you an email 30 days before renewal. Turn it on under “Settings → Notifications.”
By staying on top of these details, you’ll keep your licence in good standing and avoid the dreaded “license suspended” email.
Need a deeper dive into the whole free‑zone setup process? Our How to Set Up a Free Zone Company in Dubai: A Practical Step‑by‑Step Guide walks you through every screen of Mirsal 2, from document upload to final activation.
And remember, a polished licence isn’t just a legal requirement – it’s also a marketing asset. When you meet potential investors or partners, a crisp, active licence shows you’re legit and ready to do business.
Finally, a quick visual break:
Benefits Overview: Why Mirsal 2 Registration Matters for Your Free Zone Business
Picture this: you’ve just nailed the document checklist, hit “Submit” on Mirsal 2, and a green checkmark pops up. That moment feels like getting the thumbs‑up from a gatekeeper who finally says, “Welcome aboard.” But why does that little green tick matter beyond just moving you to the next step?
The short answer is that Mirsal 2 is more than a digital form filler – it’s the backbone of your free‑zone credibility. When the portal records a clean, error‑free licence, every stakeholder – from banks to investors – instantly trusts that your business is legit.
And that trust translates into real advantages. Let’s break down the concrete benefits you’ll see once your Mirsal 2 registration is spot on.
Credibility Boost
First, a flawless licence is a marketing asset. Walking into a meeting with a crisp PDF on your tablet signals professionalism. Prospective partners often ask, “Can I see your licence?” If you can pull up a pristine document in seconds, you’re already a step ahead of competitors still juggling paper copies.
Operational Speed
Second, the portal’s integration with government services speeds up downstream tasks. An active licence auto‑populates fields when you apply for a corporate bank account, a visa, or a customs code. In practice, that can shave two‑to‑three days off each follow‑up request – time you’d rather spend on product development.
Cost Savings
Third, errors cost money. A mismatched activity code or a missing signature forces you to re‑upload, pay extra admin fees, or even incur a penalty for late renewal. By getting the registration right the first time, you avoid those hidden costs and keep your budget tight, which is crucial for startups watching every dirham.
Compliance Confidence
Fourth, Mirsal 2 keeps you compliant with minimal effort. The system flags upcoming expiry dates, reminds you about mandatory audits, and logs every change you make. That audit trail is gold when the free‑zone authority asks for proof of adherence – you simply click, download, and hand over the report.
Future‑Proof Flexibility
Finally, a solid registration foundation makes it easier to scale. Want to add a new activity or increase share capital? The portal lets you amend your licence without starting from scratch. That agility means you can pivot your business model as market opportunities arise, without getting tangled in paperwork.
So, does a smooth Mirsal 2 experience really change the trajectory of your free‑zone venture?
In our experience, entrepreneurs who treat the registration as a strategic step report faster bank onboarding, smoother visa processing, and a stronger negotiating position with suppliers.
Bottom line: mastering the Mirsal 2 registration steps isn’t just a bureaucratic hurdle – it’s a lever you can pull to boost credibility, cut costs, stay compliant, and stay nimble. Treat each field entry as an investment in your business’s reputation, and the payoff will show up in every subsequent interaction.
Here’s a quick checklist you can copy into your notes: ✅ Verify that the licence number matches the provisional record. ✅ Ensure the activity code aligns with the free‑zone’s latest list. ✅ Turn on the expiry reminder in Settings → Notifications. ✅ Store the final licence PDF in a secure cloud folder and keep a printed copy on your desk. ✅ Review the document whenever you negotiate a new contract – a fresh licence signals that you’re still in good standing.
Common Mistakes to Avoid During Mirsal 2 Registration
Skipping the file‑naming checklist
It sounds trivial, but naming your PDFs anything other than Passport_YourName.pdf or Licence_CompanyName.pdf can stall the whole process. The portal rejects vague names like “doc1.pdf,” and you’ll get an instant “please rename” alert. That extra back‑and‑forth adds two or three days you don’t need.
Uploading the wrong file type
Mirsal 2 only accepts PDFs. If you try to upload a Word doc or an image, the system throws a generic “unsupported format” error. Convert everything to PDF first – it’s a one‑time step that saves you from a frantic re‑upload scramble.
So, what should you do next? Double‑check the format before you hit “Submit.”
Leaving activity descriptions vague
We’ve seen founders write “trading” or “consulting” and then get a request to tighten the wording. The portal wants something that matches the free‑zone’s activity code list, like “import and distribution of eco‑friendly packaging materials.” A clear, specific description avoids a week‑long clarification loop.
Mismatching licence numbers
When you upload the final licence, the portal expects the licence number exactly as it appears – no spaces, all caps. A tiny typo (e.g., “AB 12345” instead of “AB12345”) triggers a red alert and forces you to re‑enter the data. It’s an easy slip that can delay activation.
Does this really happen often? Yes. In our experience, a simple copy‑paste error has set back startups by up to 48 hours.
Ignoring the “expiry reminder” feature
Many entrepreneurs treat the reminder as optional, then scramble when the licence lapses. Turning on Settings → Notifications sends you an email 30 days before renewal, giving you plenty of time to gather documents and avoid a sudden service interruption.
Paying fees on the wrong day
Payment processing slows down on Thursdays and Fridays because the weekend backlog starts early. Pay early in the week (Monday‑Wednesday) and you’ll see the “payment received” notification almost instantly. If you wait until Friday, you might not see the confirmation until the following Monday, pushing your pre‑approval timeline.
Not keeping a physical copy handy
Even though everything is digital, banks and visa officers sometimes ask for a printed licence with a stamp. Having a hard copy on your desk means you can hand it over without scrambling for a scanner.
Forgetting to compress large PDFs
The portal caps each upload at 5 MB. Large scanned documents can exceed that limit, leading to a “file too big” error. A quick online compression (just make sure the text stays readable) keeps the upload smooth.
Bottom line: most of these mistakes are avoidable with a quick checklist. Write down file names, verify formats, double‑check activity wording, and set your payment day early in the week. A few minutes of extra care now saves you days of waiting later.
Conclusion
So, you’ve made it through the whole maze of Mirsal 2 registration steps for Dubai free zone companies, and you’re probably feeling a mix of relief and excitement.
Here’s the short cheat‑sheet: double‑check every file name, keep PDFs under 5 MB, pay early in the week, and turn on the expiry reminder in Settings → Notifications.
If a tiny typo pops up, fix it fast – the portal will flag it instantly, saving you days of back‑and‑forth.
What about the next steps? Use the waiting period to line up your corporate bank account, draft shareholder agreements, and start thinking about visa applications.
In our experience, entrepreneurs who treat Mirsal 2 as a strategic launchpad see faster onboarding, fewer compliance hiccups, and a smoother path to market.
So, what’s the final takeaway? Nail the basics, stay organized, and let the portal do the heavy lifting – then you can focus on building your business.
Ready to get your licence live? Dive back into our step‑by‑step guide for any last‑minute questions and keep that momentum going.
Remember, the Mirsal 2 system is designed to keep you compliant for years to come. By setting up alerts now, you’ll never be caught off‑guard when renewal time rolls around.
FAQ
What are the exact mirsal 2 registration steps for dubai free zone companies?
First, you log into the Mirsal 2 portal with your credentials, then upload each required PDF – passport, NOC, MOA, proof of address, and activity description – using the naming convention we’ve discussed. The system validates the files and shows a green checkmark. Next you click “Submit” and wait for the provisional licence (usually 5‑7 business days). After you receive the provisional licence, you pay the registration fee, upload the receipt, and get a pre‑approval email. Finally, you upload the final licence PDF, enter the licence number exactly as printed, and the portal marks the licence as “Active.” Following these steps in order typically gets you a live licence within a week.
Do I need a local sponsor to complete the mirsal 2 registration?
No, a local sponsor isn’t mandatory for most Dubai free zones. You only need a sponsor if the specific zone’s activity list requires one – for example, some trading or logistics zones still ask for a No‑Objection Certificate. If you’re setting up a tech, media, or professional services company, you can go 100 % foreign‑owned and skip the sponsor entirely. Just make sure your NOC field is left blank or marked “Not applicable” in the portal, otherwise the system will flag it.
How can I avoid common file‑size errors during the upload?
The portal caps each PDF at 5 MB. If a scanned document exceeds that, use a free online compressor or reopen the file in Acrobat and down‑sample the images to 150 dpi. After compression, open the file to verify the text is still legible – a blurry invoice won’t be accepted. It also helps to split a large document (like a 12‑page shareholder agreement) into two separate PDFs and upload them under the same category; the system will stitch them together automatically.
What should I do if the portal flags a missing activity code?
When you get a “missing or mismatched activity code” alert, log into the free‑zone’s activity list page, copy the exact code (e.g., “5112 – Software Development and Licensing”), and paste it back into the Mirsal 2 activity field. Double‑check spelling, hyphens, and spaces – the portal is case‑sensitive. If the code still doesn’t match, send a quick clarification email to the zone’s support desk; they usually respond within a few hours and will let you know if the activity needs a slight wording tweak.
Can I edit my documents after I’ve submitted them?
Yes, but only while the application status is still “Pending.” Click the “Edit” button next to the document you need to replace, upload the corrected PDF, and the system will re‑run its validation. Once you receive the provisional licence, the upload window closes and any changes require a formal amendment request, which adds a few extra days and a small admin fee. That’s why we always recommend a final “quick‑scan” of every file before hitting Submit.
How do I set up expiry reminders so I don’t miss licence renewal?
Head to Settings → Notifications in the Mirsal 2 dashboard and toggle the “Expiry Reminder” switch. Choose the “30 days before” option, and the portal will email you a reminder plus a downloadable renewal checklist. You can also add the reminder to your personal calendar; the email contains a .ics file you can import directly. Turning this feature on saves you from the dreaded “license suspended” email that many entrepreneurs get when they forget to renew.
Is there a way to track the status of my application in real time?
Absolutely. The “My Applications” tab shows a colour‑coded progress bar: grey for uploaded, yellow for under review, and green for approved. Hover over each stage to see a timestamp and any notes from the reviewer. If a note appears (for example, “please clarify share‑capital amount”), you’ll get an email alert and can respond directly from the portal. This live view helps you plan the next steps – like opening a corporate bank account – without guessing where the process stands.