Ever stared at the idea of launching your own business and felt that a little extra tax relief could be the game‑changer?
You’re not alone. Many entrepreneurs picture a sleek office in Dubai, a passport‑friendly environment, and wonder, “how do I actually get my company off the ground there?”
Here’s the thing: opening a company in a Dubai free zone isn’t a maze of red tape – it’s a step‑by‑step process that anyone with a clear plan can tackle.
Think about the moment you first imagined your brand thriving under bright desert skies. That vision becomes real when you understand the core steps: picking the right free zone, gathering documents, submitting the application, and activating your license.
So, what’s the first move? Choose a free zone that matches your industry. Whether you’re into tech, trading, or creative services, there’s a hub tailored to your niche, and the right fit can shave months off your timeline.
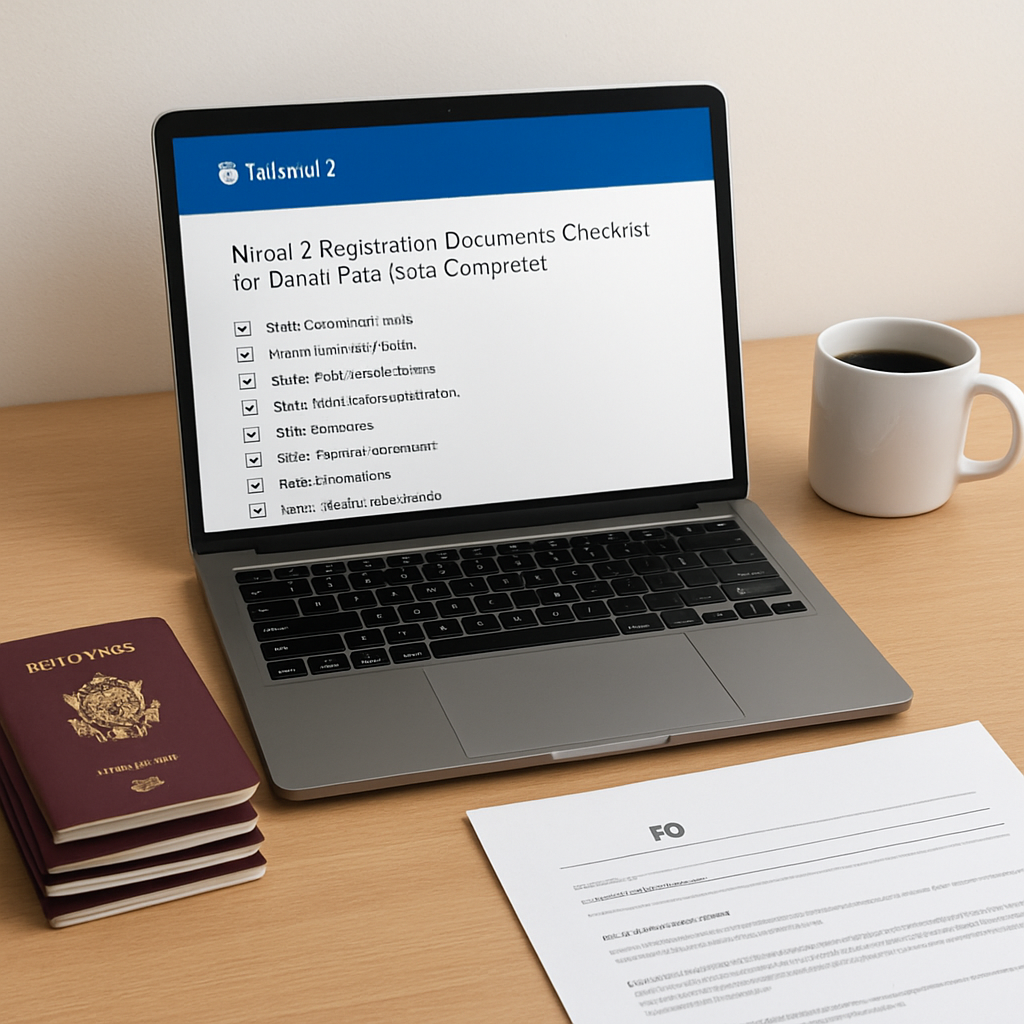
Next, get your paperwork in order. A passport copy, a brief business plan, and a bank reference are usually enough to get the ball rolling. It feels a bit like packing for a trip – you only bring what you truly need.
Once you’ve submitted the application, the authority reviews it, issues an initial approval, and then you pay the license fee. After that, you receive your trade license and can open a corporate bank account – the moment many founders describe as “the lights finally turning on.”
And don’t forget the optional but valuable services like business feasibility studies or trade‑finance advisory that can smooth out any lingering doubts.
By the end of this guide, you’ll walk away with a clear checklist, insider tips, and the confidence to say, “I’m ready to set up shop in a Dubai free zone.”
Let’s dive in and turn that curiosity into a concrete plan.
TL;DR
If you’ve ever wondered how to open a company in Dubai free zone, this guide breaks down the four essential steps—choosing the right zone, prepping paperwork, submitting your application, and activating your license—so you can skip the guesswork. By the end you’ll have a clear checklist, insider tips, and the confidence to launch your business under the desert sun.
Step 1: Choose the Right Free Zone
First thing’s first… you’ve decided to set up shop in Dubai, but the real question is: which free zone actually fits the DNA of your business?
Think about the last time you bought a pair of shoes. You didn’t just walk into any store – you went where the style, price and vibe matched what you wanted. The same logic applies to free zones: you need a hub that speaks your industry’s language, offers the right infrastructure, and won’t eat up your budget.
1. Pin down your core activity
Write down, in plain English, what you’ll be doing day‑to‑day. Are you importing raw materials and re‑exporting them? Are you building a SaaS platform that needs high‑speed data centres? Are you a media house that thrives on creative studios?
Once the activity is crystal clear, you can filter zones that actually permit that line of business. For example, the Dubai Multi Commodities Centre (DMCC) licences over 600 activities, from precious‑metal trading to fintech, while Dubai Internet City (DIC) is tailor‑made for tech and digital agencies.
2. Match the zone’s strengths to your needs
Here’s a quick way to think about it: create a three‑column table in a notebook – “Industry Fit”, “Cost”, “Location & Logistics”. Fill each free zone you’re eyeing with a score from 1‑5. The zone with the highest total wins.
Real‑world example: Sara wanted to launch an e‑commerce platform that ships globally. She chose Jebel Ali Free Zone (JAFZA) because the zone sits next to the world‑class port, cutting shipping time by 30 % and giving her access to a fully automated inventory control system – a requirement highlighted by JAFZA inventory compliance requirements. That tech edge saved her both time and costly customs penalties.
Another case: Ahmed, a fintech founder, opted for the Dubai International Financial Centre (DIFC) because its regulatory sandbox and proximity to banks made fundraising smoother. The zone’s reputation also helped him attract venture capital that might have stayed away from a generic industrial park.
3. Look at the cost structure
Free zones charge a mix of licence fees, office rent (or flexi‑desk fees), and sometimes a minimum share capital. For instance, DMCC requires a minimum paid‑up capital of AED 50,000 per company, whereas Dubai Airport Free Zone starts at AED 1,000. Compare these numbers against your cash flow forecast.
Don’t forget hidden costs: registration, visa processing, and mandatory insurance. A simple spreadsheet can help you see the total first‑year outlay versus the long‑term savings from tax exemptions.
4. Test the regulatory environment
Some zones have extra layers of approval. If you’re dealing with food & beverage, you’ll need sign‑off from the Abu Dhabi Agriculture and Food Safety Authority, even if your licence is issued by a Dubai zone. The official guide on starting a business in a UAE free zone outlines these sector‑specific checkpoints.
Non‑compliance can turn into a costly audit. JAFZA, for example, expects a fully computerized inventory system; missing a single entry could be flagged as smuggling under GCC customs law, leading to heavy fines.
Now that you’ve scoped the big picture, it’s time to dive into the nitty‑gritty checklist.
5. Actionable checklist
- Write a one‑sentence description of your core activity.
- List three free zones that publicly allow that activity.
- Score each zone on industry fit, cost, and logistics (1‑5).
- Verify any extra regulatory approvals required for your sector.
- Contact a specialist to confirm the numbers – Understanding UAE Free Zones: Opportunities for Businesses and Investors can walk you through the comparison.
When you’ve ticked every box, you’ll have a clear picture of which free zone will accelerate your launch instead of slowing you down.

Step 2: Prepare Required Documents
Alright, you’ve picked the zone that feels like the right fit. Now the real work begins – gathering the paperwork that will convince the authorities you’re ready to launch. Think of it as packing for a trip: you don’t want to forget your passport, but you also don’t want to lug around your whole closet.
1. Passport copy and visa status
The most basic requirement is a clear, colour‑filled passport scan. If you’re on a visit‑visa, you’ll need the visa page too. Some zones even ask for a recent Emirates ID front and back – it’s their way of confirming you’re legally in the country.
Pro tip: use a high‑resolution PDF (300 dpi) and name the file Passport_YourName.pdf. It looks tidy and speeds up the review.
2. Proof of residence
Even if you live outside the UAE, you’ll still be asked for a utility bill or bank statement showing your home address. The document must be less than three months old. If you’re already a resident, a tenancy contract or Ejari will do.
Imagine Sara, a European e‑commerce founder, who tried to upload a scanned copy of a two‑year‑old electricity bill. The portal rejected it, delaying her JAFZA approval by a week.
3. Business plan or activity description
Most free zones ask for a one‑page snapshot of what you’ll actually do. Keep it simple: state the activity, target market, and expected turnover for the first year. If you’re in a regulated sector (food, health, education), attach any extra approvals you’ve already secured.
For example, Ahmed’s fintech startup listed “digital payment gateway for MENA SMEs” and added a brief regulatory sandbox note from DIFC. The clarity earned him a provisional approval within 48 hours.
4. Bank reference or proof of funds
Because the UAE wants to ensure your business is financially viable, a bank reference letter (or a screenshot of a minimum AED 50,000 balance) is often required. If you’re raising capital, a term sheet works too.
Tip: ask your bank for a “standard reference letter” that includes your name, account number, and a statement that the account is in good standing. It saves you a back‑and‑forth email chain.
5. Memorandum of Association (MoA) or incorporation documents
If you’re registering a branch of an existing foreign company, you’ll need a notarised copy of the parent’s MoA and a board resolution approving the UAE branch. For a fresh LLC, the free zone will draft the MoA for you – just sign and return.
Remember the case of a Saudi trading firm that tried to upload a non‑notarised MoA. The authority sent it back, and the whole process slipped by a month.
6. Additional sector‑specific permits
Some activities, like pharmaceuticals or educational services, need approval from the Ministry of Health or the Knowledge and Human Development Authority. Grab those letters before you start the free‑zone portal – otherwise you’ll hit a “missing document” roadblock.
According to Meydan Free Zone’s checklist, having every document in order reduces the average processing time from 12 days to under 5 days.
7. Create a master checklist
Write down every file you need, tick it off as you upload, and keep a backup copy on a cloud drive. A simple table with columns “Document”, “Format”, “Date Uploaded”, “Status” works wonders.
And if you ever feel stuck, you can always reach out for personalised help – Contact Us – UAE Free Zone Finder will walk you through any missing piece.
Quick‑action checklist
- Passport scan (PDF, colour, < 3 MB)
- Visa page or Emirates ID
- Proof of residence (≤ 3 months)
- One‑page activity description or business plan
- Bank reference or proof of AED 50k capital
- MoA or parent‑company board resolution
- Any sector‑specific approvals
Once you’ve uploaded everything, sit back and watch the portal turn your files into a provisional approval. The next step – paying the licence fee and getting your trade licence – feels a lot less intimidating when you know your docs are spotless.
Step 3: Submit Application & Pay Fees
Alright, you’ve double‑checked every document, and the portal is waiting for you to hit “Submit”. It’s a little like standing at the checkout line after a long grocery run – you’re almost done, but you still need to swipe that card and make sure the receipt looks right.
3.1 Upload the final dossier
Log into the free‑zone’s online portal (most zones use a single, unified system). Drag‑and‑drop each file from your master checklist, making sure the filenames follow the format the authority suggests – e.g., Passport_JohnDoe.pdf. If a file exceeds the size limit (usually 3 MB), compress it or split it into two parts; the system will reject oversized uploads and waste your time.
Pro tip: after each upload, the portal shows a green checkmark and a timestamp. Screenshot that confirmation and stash it in a folder called “Submission Proof”. If something goes wrong later, you’ll have a paper trail ready for the support desk.
3.2 Verify provisional approval
Within 24‑48 hours, you should receive a provisional approval notification. This is the free‑zone’s way of saying, “We’ve looked at your paperwork and it’s good enough to move to the next step.” In many zones, you can see the status live on a dashboard; in others, you’ll get an email with a reference number.
Example: Ahmed, who set up a fintech firm in DIFC, got his provisional approval in just under 48 hours after uploading a clean business plan and a sandbox approval letter. That speed gave him confidence to start negotiating with local banks.
3.3 Calculate the exact fees
Now the numbers appear. Fees typically include the licence fee, registration fee, and any optional services like a physical office or flexi‑desk. The DMCC blog notes that free‑zone licence fees can range widely, and visa costs hover between AED 3,000 – AED 7,000 per visa, depending on the zone and visa type according to DMCC’s fee breakdown. Jafza’s own guide confirms that the total set‑up cost, from application to licence issuance, usually falls between 3 – 14 business days once all payments are cleared as outlined in Jafza’s company formation page.
Tip: Use the free‑zone’s fee calculator (if available) or ask their customer service for a detailed invoice before you pay. Unexpected surcharges—like a “document handling fee”—can pop up if you skipped a required step.
3.4 Make the payment
Most zones accept credit cards, bank transfers, or a UAE‑based corporate account. Choose the method that gives you an instant receipt; a credit‑card transaction will usually generate an email receipt within seconds, which you can immediately upload as proof of payment.
When you pay, you’ll be asked to select the licence type you applied for (e.g., commercial, service, industrial). Double‑check that the licence description matches the activity you listed in your business plan – a mismatch can force you back to the document upload stage.
If you’re nervous about the amount, remember you can spread the cost over two years by opting for a 2‑year licence, which often comes with a modest discount. The payment terms are clearly listed on the free‑zone’s “Payment Terms” page, which explains the schedule and any late‑payment penalties Payment Terms – UAE Free Zone Finder.
3.5 Final confirmation and next steps
After the payment clears (usually within a few hours), the portal will issue a formal trade licence PDF. Download it, store it safely, and print a hard copy for your records. At this point you can also request your corporate bank account – most banks will ask for the licence PDF and the receipt of fee payment.
Actionable checklist:
- Upload every file, watch for green checkmarks.
- Save the provisional approval reference number.
- Run the fee calculator or request an itemised invoice.
- Pay using a method that gives an instant receipt.
- Download the trade licence and keep a backup.
- Contact the free‑zone’s support if any status stays “Pending” for more than 48 hours.
And that’s it – the moment most entrepreneurs describe as “the lights finally turning on.” You’ve moved from a stack of PDFs to an official licence that lets you open a bank account, sign contracts, and start doing business under the desert sun.
Step 4: Compare License Types & Costs
Now you’ve gathered the paperwork and paid the fee, it’s time to ask the real question: which licence actually fits the way you want to do business?
Dubai’s new Resolution No. 11 of 2025 shook up the old rule that a free‑zone company could only operate inside its own zone. The regulator now recognises three licence families – commercial, service and industrial – and each comes with its own cost structure and activity scope according to Baker McKenzie. Understanding these families helps you avoid paying for privileges you’ll never use.
Why the licence type matters
Think about it like picking a gym membership. A basic pass lets you use the treadmill, but if you want the pool or personal trainer you need a higher‑tier plan. The same goes for free‑zone licences – a commercial licence covers buying‑and‑selling goods, a service licence is for consulting or IT, while an industrial licence unlocks manufacturing and heavy‑equipment use.
But there’s another layer: costs aren’t just the headline fee. You’ll also pay for office space (or a flexi‑desk), visa quotas, and sometimes a minimum share capital. The Inlex comparison of mainland and free‑zone setups notes that free‑zone licences typically range from AED 10,000 to AED 30,000 per year, plus variable office fees, whereas mainland licences can be cheaper up‑front but bring additional local sponsorship costs.
Quick checklist to compare
- Identify the activity you’ll perform most often.
- Match it to the licence family (commercial, service, industrial).
- Calculate the base licence fee plus office/visa add‑ons.
- Check if you need a 1‑year or 2‑year term – the latter often gives a modest discount.
- Ask yourself whether you’ll ever need to operate outside the free zone; if yes, you’ll need a DET permit under the new resolution.
And remember, you don’t have to figure this out alone. Our Trade Finance Advisory Services can walk you through the numbers and make sure you pick the most cost‑effective licence for your growth plan.
Side‑by‑side licence snapshot
| Licence Type | Typical Annual Cost (AED) | Best For |
|---|---|---|
| Commercial Licence | 10,000 – 15,000 (plus office/visa) | Trading, import‑export, wholesale activities |
| Service Licence | 12,000 – 18,000 (plus office/visa) | Consulting, IT services, marketing, education |
| Industrial Licence | 20,000 – 30,000 (plus factory space) | Manufacturing, assembly, heavy‑equipment operations |
Notice the jump in cost when you move from a service to an industrial licence – that’s because you’re also paying for specialised infrastructure and higher regulatory oversight.
So, what’s the next move? Grab a spreadsheet, list the three licence families, plug in the numbers you saw above, and rank them by how closely they align with your core activity and budget. If the industrial option feels too pricey, ask the free‑zone authority whether a hybrid “service‑plus‑manufacturing” licence exists – some zones offer custom packages.
Bottom line: comparing licence types isn’t a one‑size‑fits‑all exercise. It’s a quick cost‑benefit analysis that can shave thousands of dirhams off your first‑year outlay and keep you compliant with the latest Dubai regulations.
Step 5: Finalize Setup & Open Bank Account
So you’ve got the licence in hand and the office space sorted – the moment most founders describe as the “lights finally turning on.” But the real engine of your new Dubai free‑zone company is the corporate bank account. Without it you can’t pay suppliers, collect payments, or even get a visa.
Why the bank account matters
Think of your business as a car. The licence is the steering wheel, the office is the chassis, and the bank account is the fuel. If you’re running on empty, everything stalls. A local account also satisfies the free‑zone authority’s compliance checks and gives you access to UAE‑wide payment networks.
Step‑by‑step checklist
1️⃣ Choose the right bank. Emirates NBD, FAB, ADCB and Mashreq dominate the market, but many newcomers opt for fintech‑friendly banks that accept non‑resident signatories. Look for a bank that offers a dedicated relationship manager for free‑zone clients.
2️⃣ Gather the core documents. You’ll need:
- The trade licence PDF you just downloaded.
- Proof of address for the company (your flexi‑desk lease or office lease).
- Passport copies and UAE visa page (or Emirates ID) for each shareholder and authorized signatory.
- Bank reference letters or a screenshot showing a minimum AED 50,000 balance.
- Memorandum of Association (MoA) and any sector‑specific approvals.
3️⃣ Certify any foreign documents. If your company was incorporated abroad, the UAE does not accept Hague‑apostille, so you’ll need to get the documents attested at your home country’s embassy in the UAE, then legalised by the Ministry of Economy. Wise explains the required documents for a UAE corporate account – the process can add two‑to‑three weeks, so start early.
4️⃣ Submit the application. Most banks let you begin online, uploading the PDFs you just prepared. After the digital upload, a bank representative will schedule an in‑person (or video) interview. Be ready to discuss your business activity, expected transaction volume, and the source of funds.
5️⃣ Answer compliance questions. The UAE’s AML regime is strict. Expect to provide a brief business plan, client list, and projected cash‑flow for the first 12 months. If you’re a fintech or trading firm, mention any regulatory sandbox approvals – that can speed things up.
6️⃣ Fund the account. Minimum balances vary: Emirates NBD asks for AED 25,000, while some boutique banks accept as low as AED 10,000. Once the deposit clears, you’ll receive your debit/credit cards and online banking credentials.
Real‑world examples
Take Lina, a European e‑commerce founder who set up in JAFZA. She chose a bank that allowed a non‑resident signatory and uploaded her licence, lease, and a notarised MoA. After a quick 10‑day compliance review, her account was live, letting her pay her Chinese supplier via a single UAE‑based transfer instead of costly SWIFT fees.
Meanwhile, Omar, a Saudi fintech startup in DIFC, needed a sandbox approval letter. He submitted it alongside his licence and a detailed cash‑flow forecast. The bank’s relationship manager flagged the sandbox as low risk, so the account was approved in under a week – a huge advantage when you’re chasing a Series A round.
Tips from the front line
Tip 1: Ask the bank for a written fee schedule before you sign. Common hidden costs include international transfer fees, monthly maintenance charges, and “document handling” fees.
Tip 2: Keep a “submission proof” folder – screenshots of every green checkmark in the portal, plus email receipts. If a status stays “Pending” for more than 48 hours, call the bank’s support line armed with that evidence.
Tip 3: Consider a dual‑account strategy. Use a traditional UAE bank for local transactions and a fintech solution like Wise Business for cross‑border payments. This can shave off up to 40 % on transfer fees and give you a mid‑market exchange rate.
When things go sideways
If the bank rejects your application, don’t panic. The most common reasons are incomplete documentation or a perceived mismatch between your licence activity and the bank’s risk appetite. Request a written clarification, fix the gap, and re‑apply. In many cases, switching to a bank that specializes in free‑zone companies solves the problem.
Another snag: some banks require at least one signatory to hold a UAE residency visa. If you’re a non‑resident, look for banks that accept a “resident nominee” service – a local partner who holds the visa while you retain full ownership.
Next steps after the account is live
Now that the corporate account is active, you can:
- Set up payroll for any UAE‑based employees.
- Apply for additional visas tied to your licence.
- Activate trade finance tools – letters of credit, documentary collections, etc.
- Start invoicing clients in AED, USD, or EUR with seamless conversion.
If you feel overwhelmed, our corporate banking services team can walk you through each step, from bank selection to final account activation.

Conclusion
So there you have it – a clear roadmap for how to open a company in Dubai free zone, from picking the right hub to getting that first corporate bank account live.
Remember the feeling when you first imagined your business under the desert sun? That excitement is the fuel that will carry you through the paperwork, the fees, and the occasional hiccup.
If the bank says “no” or a document gets rejected, don’t panic. Grab the feedback, tweak the file, and try again – most founders land on the right track after one or two rounds.
What’s the next move? Take the checklist you’ve just built, set a deadline for each item, and lock in a quick call with a UAE Free Zone Finder specialist to double‑check your numbers.
In practice, a few extra minutes spent verifying visa requirements or confirming the licence family can shave weeks off your launch timeline. Think of it as buying insurance for your launch day.
Finally, celebrate the small wins – a provisional approval, a signed lease, a live bank account. Those milestones are proof that the lights are indeed turning on.
Ready to turn that vision into reality? Let’s get your company registered today.
FAQ
What are the first steps to take when figuring out how to open a company in Dubai free zone?
First, pin down the exact activity you plan to run – a one‑sentence description helps you match the right zone fast. Then, shortlist three free zones that openly allow that activity and score them on industry fit, cost, and logistics. Finally, check any sector‑specific approvals (like food‑safety or fintech sandbox) before you start filling out the application portal.
Do I need a UAE resident sponsor to start a free‑zone company?
No, that’s a common myth. Free‑zone companies are 100 % foreign‑owned, so you don’t have to appoint a local sponsor or partner. The only time a UAE resident might appear is if a bank insists on a resident nominee for a corporate account, but the free‑zone authority itself never requires one.
How long does the whole registration process usually take?
Once you’ve uploaded a clean set of documents, you can expect a provisional approval within 24‑48 hours. After paying the licence fee, the final trade licence typically arrives in 3‑5 business days. In practice, most founders see the whole loop – from document prep to licence PDF – wrap up in about one to two weeks, provided there are no missing papers.
What documents are absolutely mandatory for the application?
At a minimum you’ll need a colour passport scan, a proof‑of‑address (utility bill or bank statement less than three months old), a one‑page activity description, a bank reference or proof of AED 50,000 capital, and the Memorandum of Association (or the free‑zone‑drafted MoA for a new LLC). If you’re in a regulated sector, attach the relevant ministry approval before you hit submit.
Can I open a corporate bank account before the licence is issued?
Most UAE banks want to see the official trade licence and the fee receipt, so the account usually opens after the licence is in hand. However, a few fintech‑friendly banks will start a soft‑on‑boarding once you’ve uploaded the licence draft and the lease, letting you queue the final steps while the licence is being printed.
What are the hidden costs I should watch out for?
Beyond the headline licence fee, budget for office or flexi‑desk rent, visa fees (AED 3,000‑7,000 per visa), a minimum share‑capital deposit, and any “document handling” or “service charge” fees that some zones tack on. Also, keep an eye on bank maintenance fees and cross‑border transfer costs – they can add up quickly if you’re moving money internationally.
How do I know which licence type – commercial, service or industrial – fits my business?
Map your core activity to the three licence families introduced by Dubai’s Resolution No. 11 of 2025. If you’re buying and selling goods, a commercial licence is the go‑to. Consulting, IT, or education falls under a service licence. Manufacturing or heavy‑equipment use needs an industrial licence. Once you’ve matched the activity, compare the base fee plus office and visa add‑ons to see which package stays within your budget.